
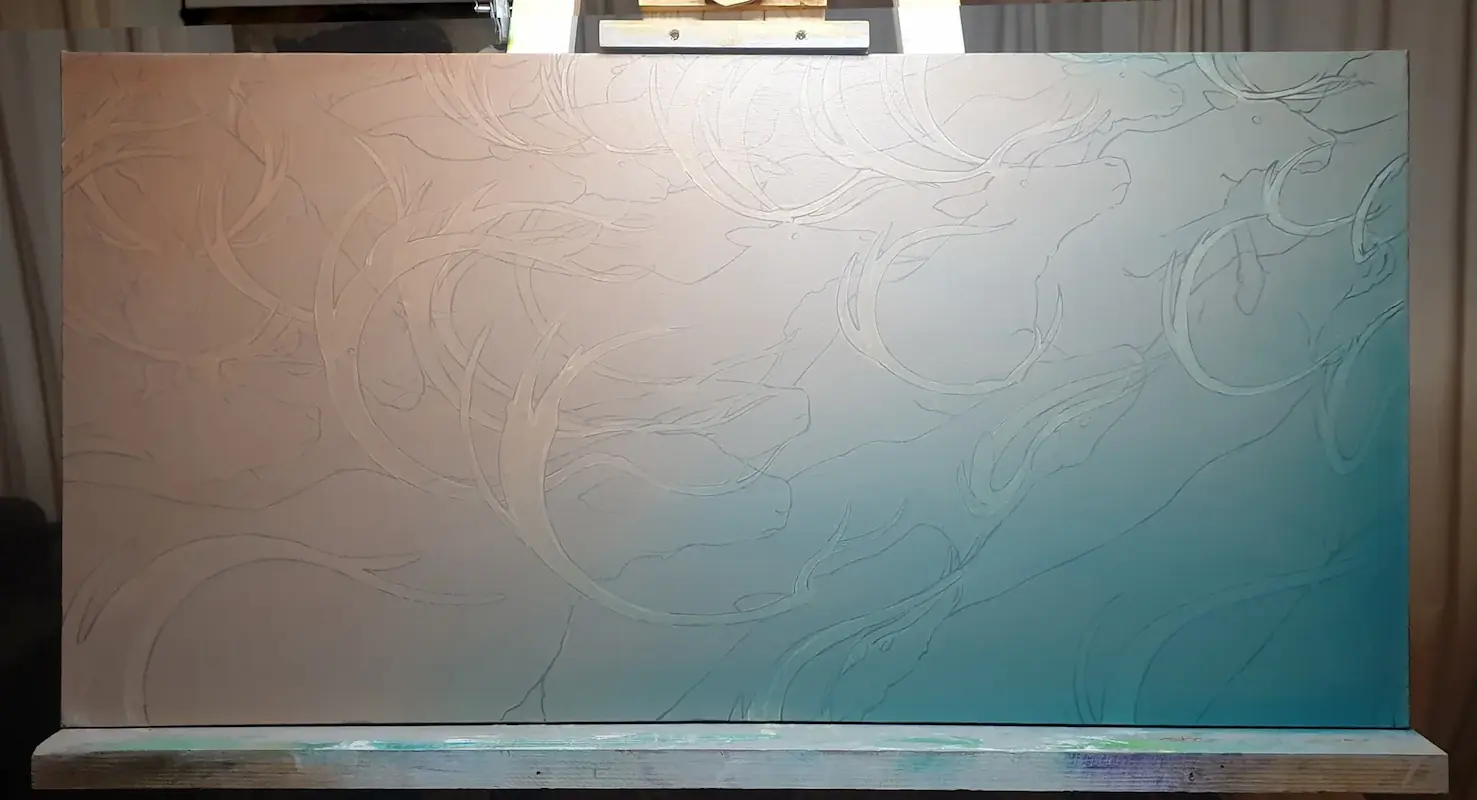
Step one: Rough shapes
In this case, I just used sausages to represent the reindeer bodies. Simple shapes helped me to focus on the movement and direction without getting distracted by detail.
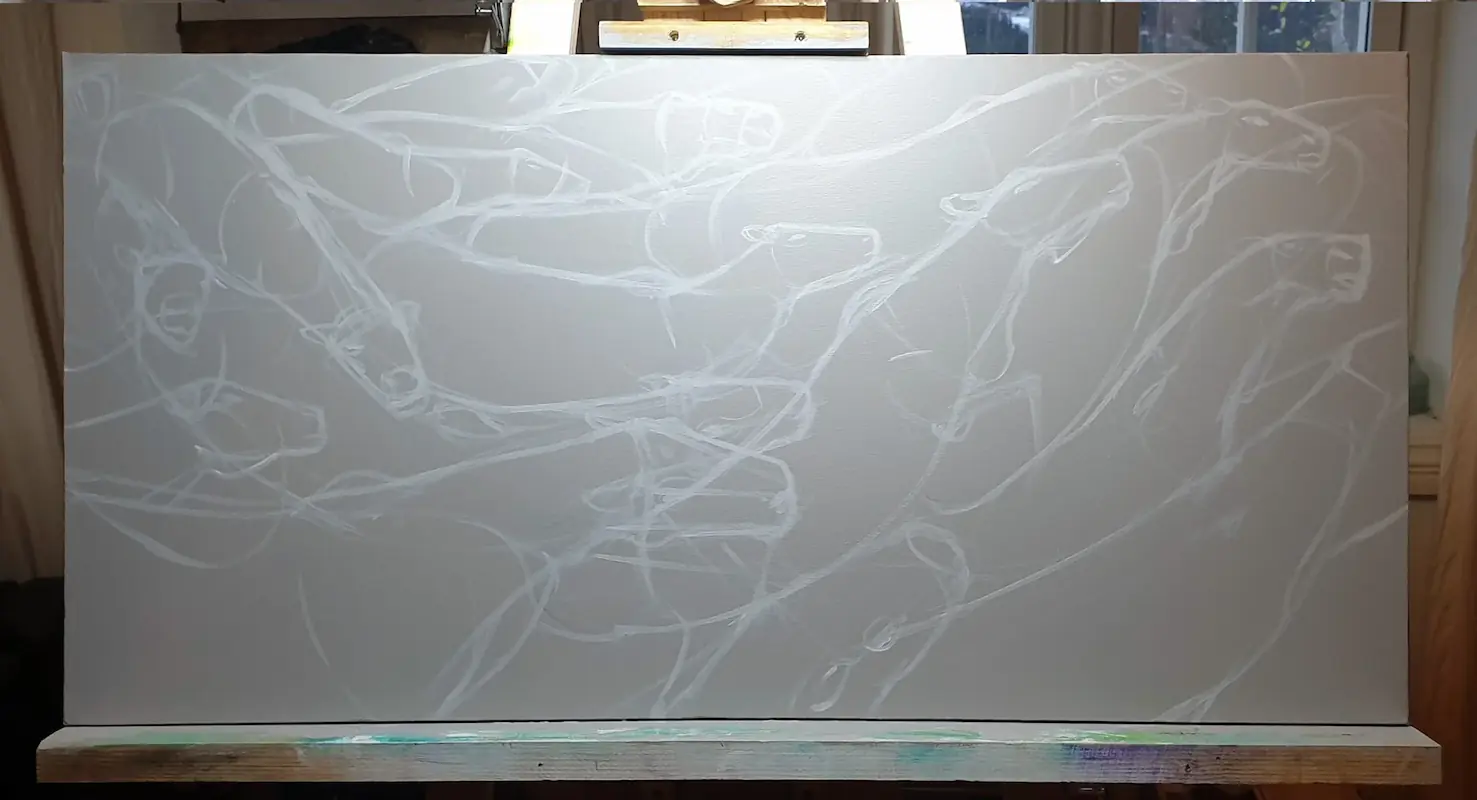
Step two: Add features
Basically just adding rough heads, necks and legs onto the sausages and getting an idea of body shape. Both steps 1 and 2 use a lightened version of the background colour.

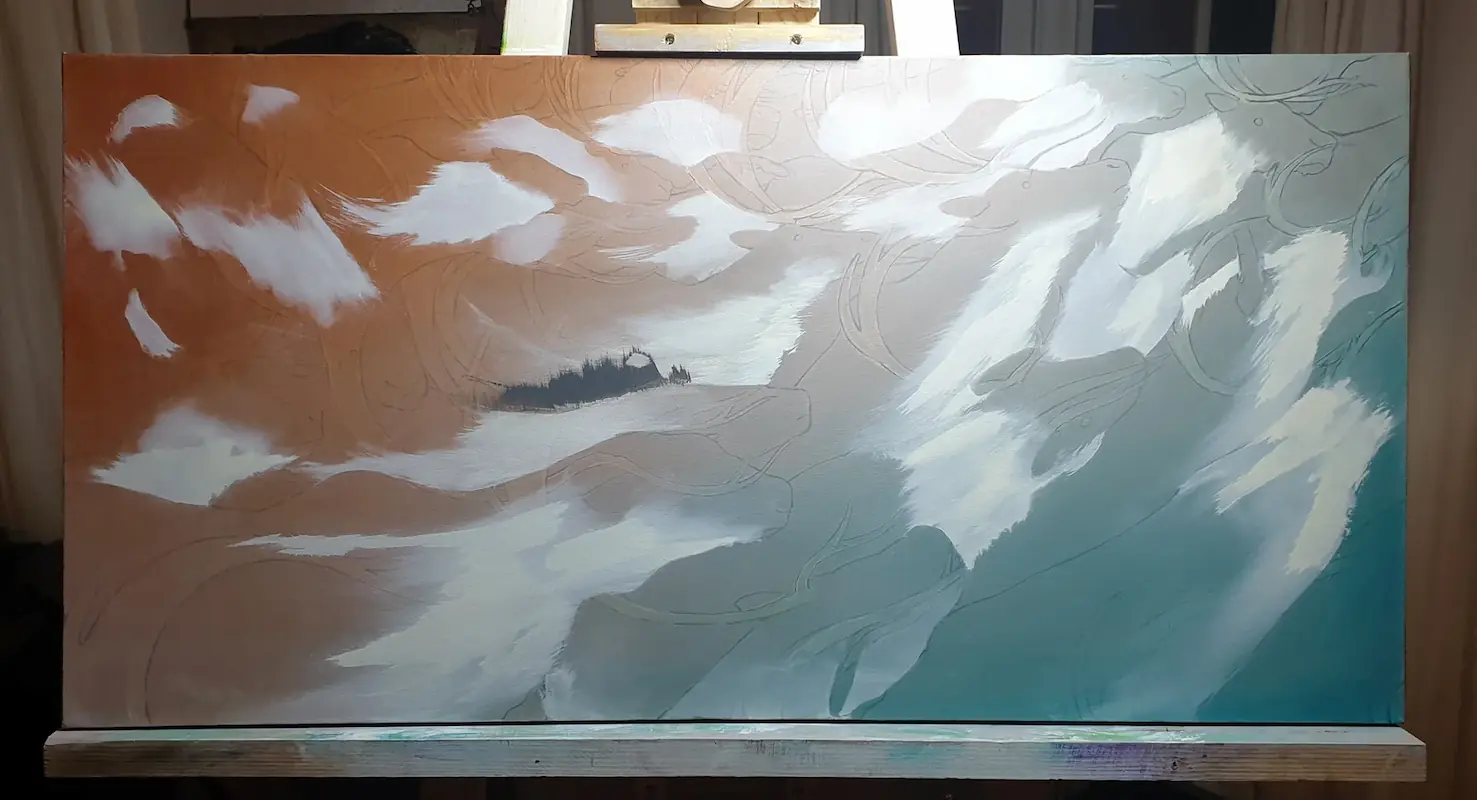
Step three: Refine features
Here I used a white paint to get the features more dialed-in. The white stands out against the light grey sketch paint from steps 1 and 2.
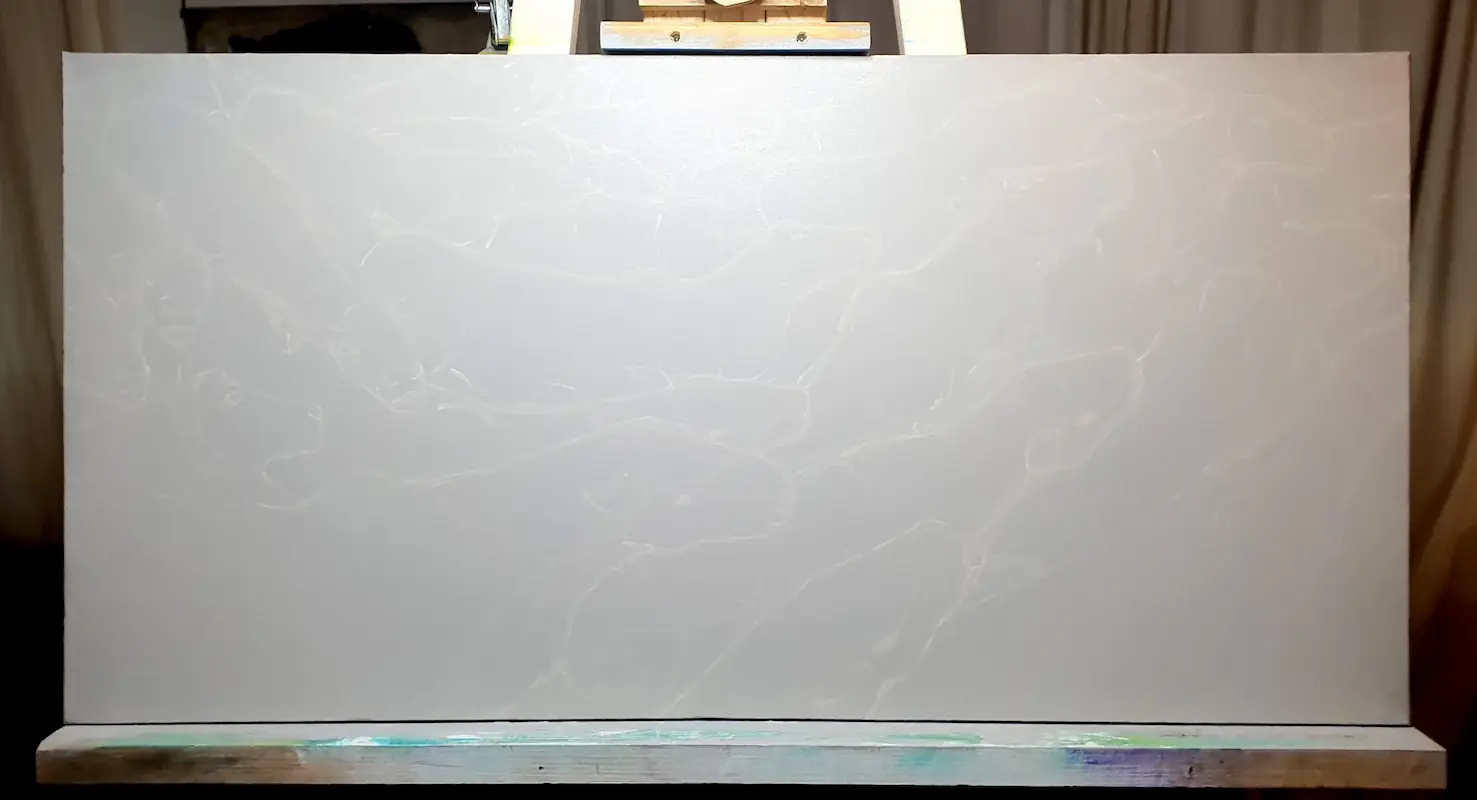
Step four: Mute the sketch lines
I applied a semi-thin layer of the light grey sketch colour over the whole piece. This effectively killed my initial sketch lines, but the white lines remain visible.
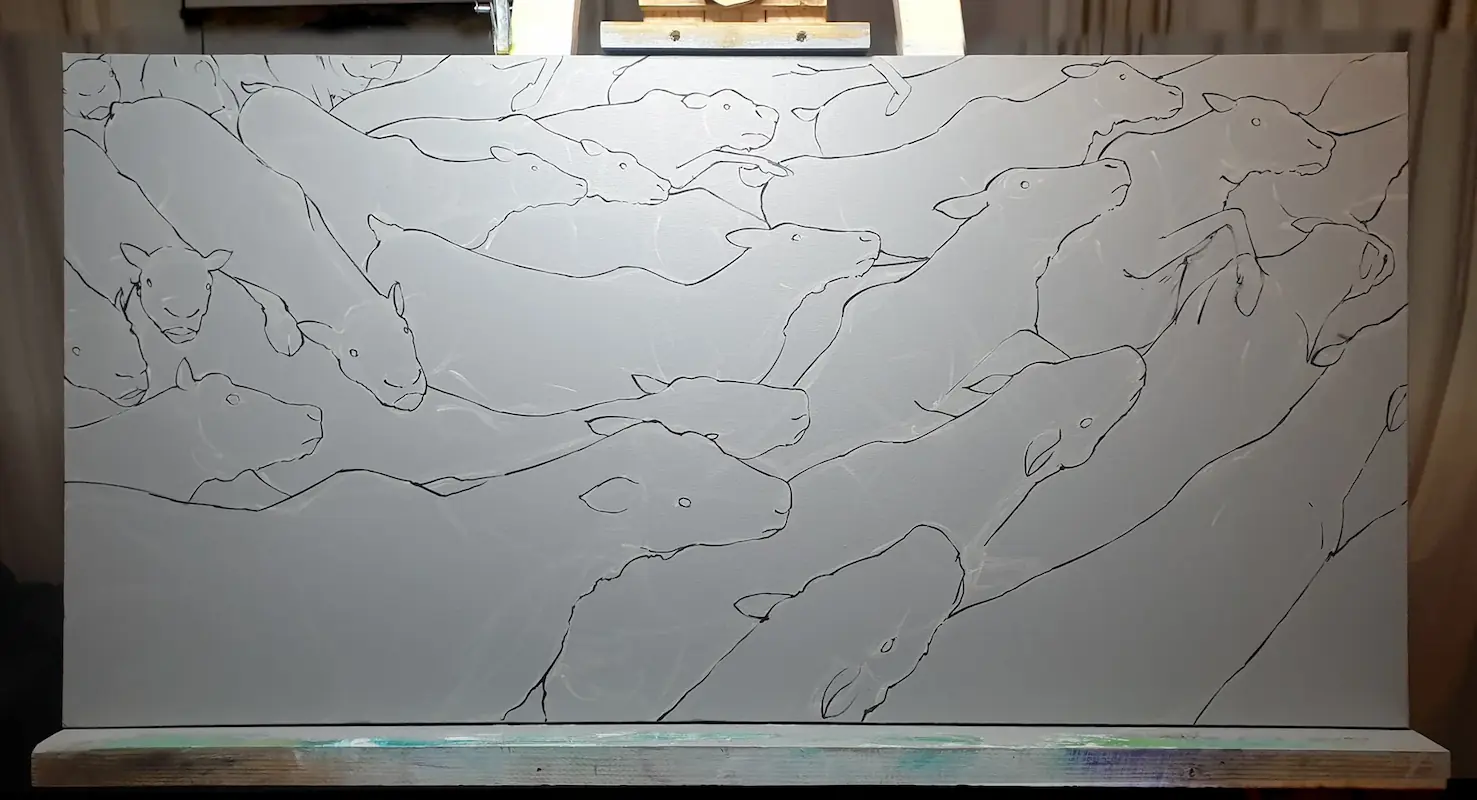
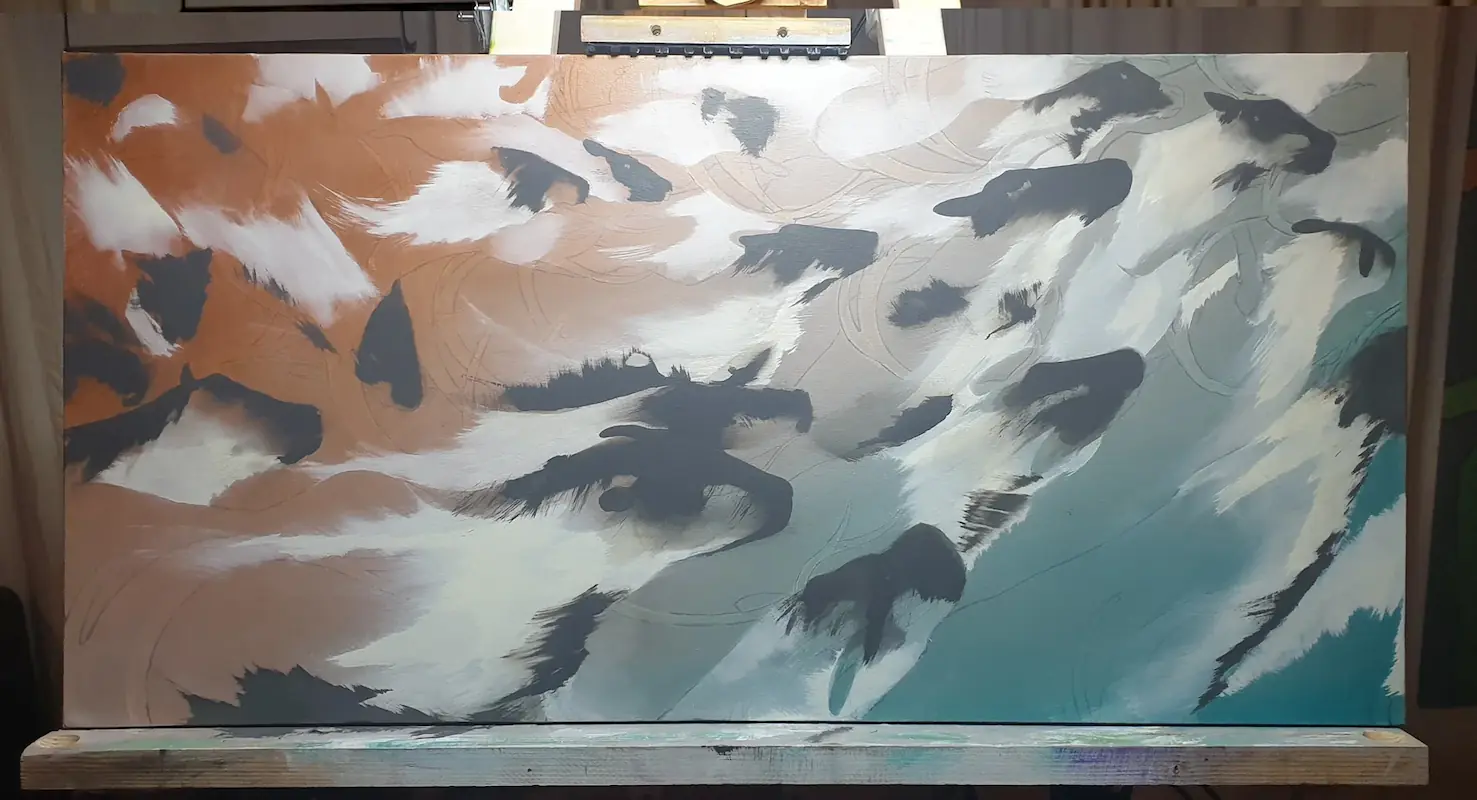
Step five: Get the animals locked-in
Using the faint white lines as a guide, I made painted black outlines to define the reindeer as best as I could. The black will be visible once the colour gradient is applied.
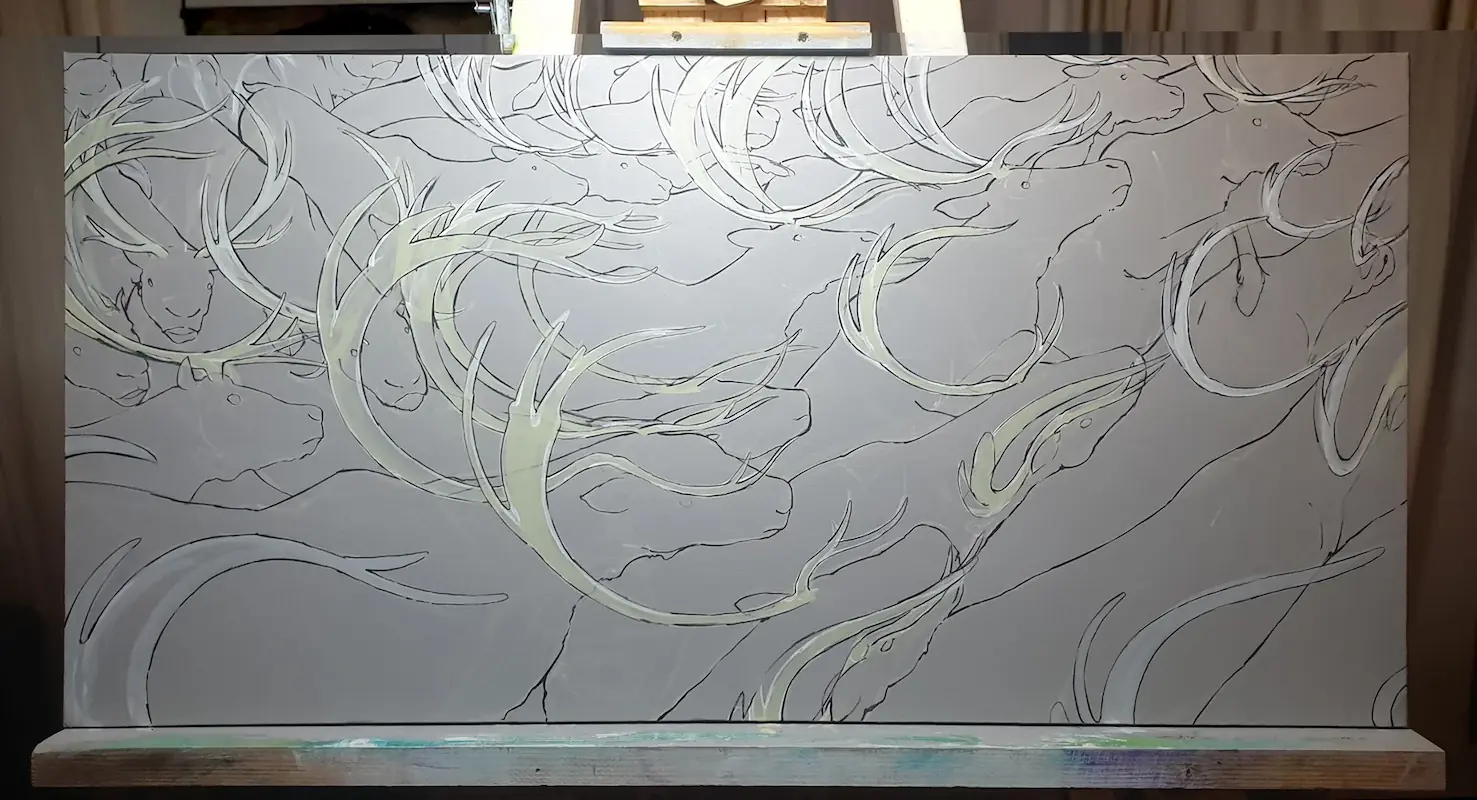
Step six: Add extra features (optional)
Sketched and lined the antlers. I wrote "optional" since now I might opt to skip this step and just freehand the antlers later once all the colour has been applied.
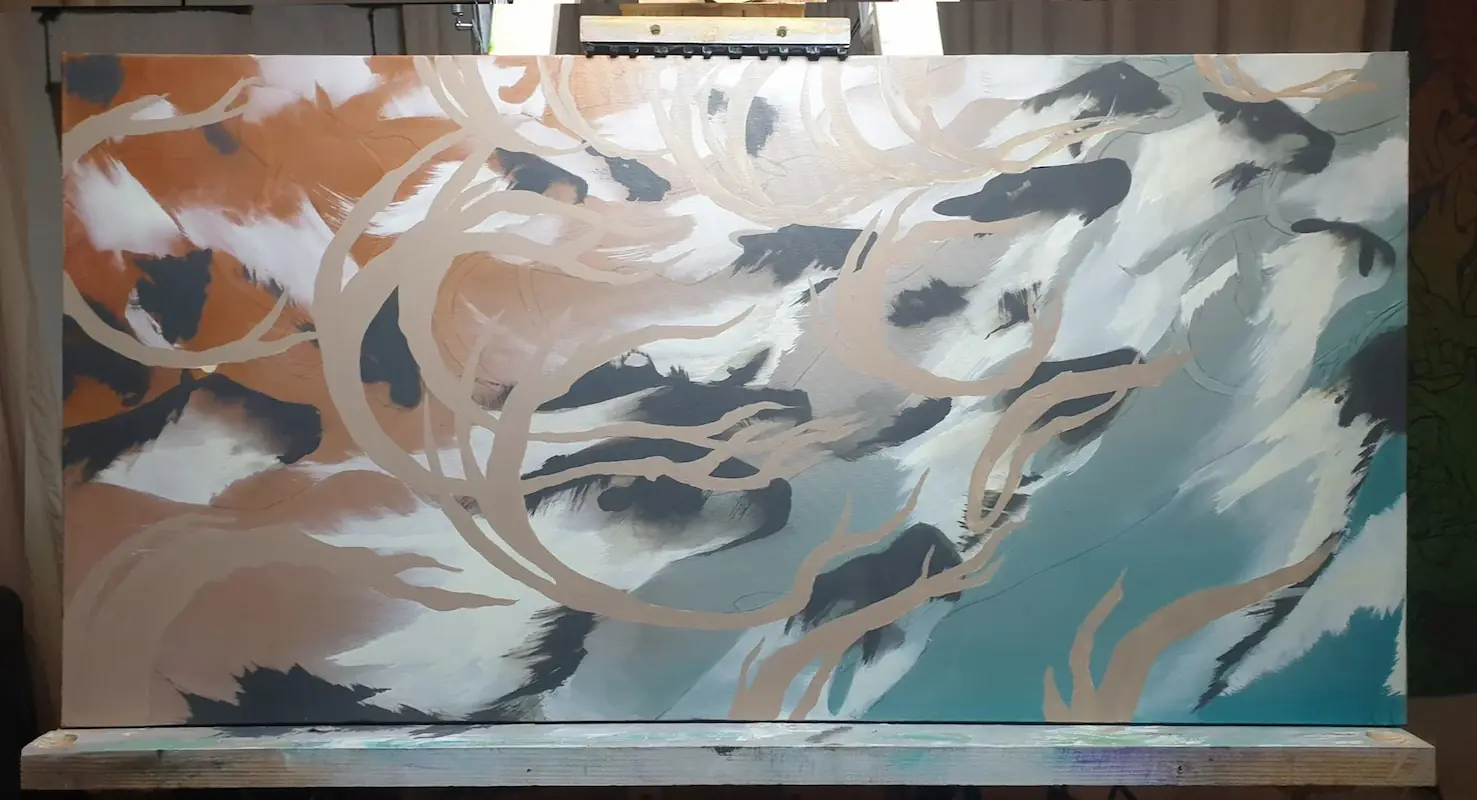
Step seven: Apply main colour
Add colour gradient. Must be thick enough to convey richness, but thin enough to let the black lines show through.
Step eight: Add light colour
Light colour, in this case the white fur on the reindeer.
Step nine: Add dark colour
Dark colour — faces and dark fur patches. These steps are probably the most confusing and messy. Keep pushing, it'll be worth it.
Step ten: Paint extra feature
Paint the antlers colour. This is where I'd probably just freestyle them on, but the guidelines underneath are handy if you lack confidence.
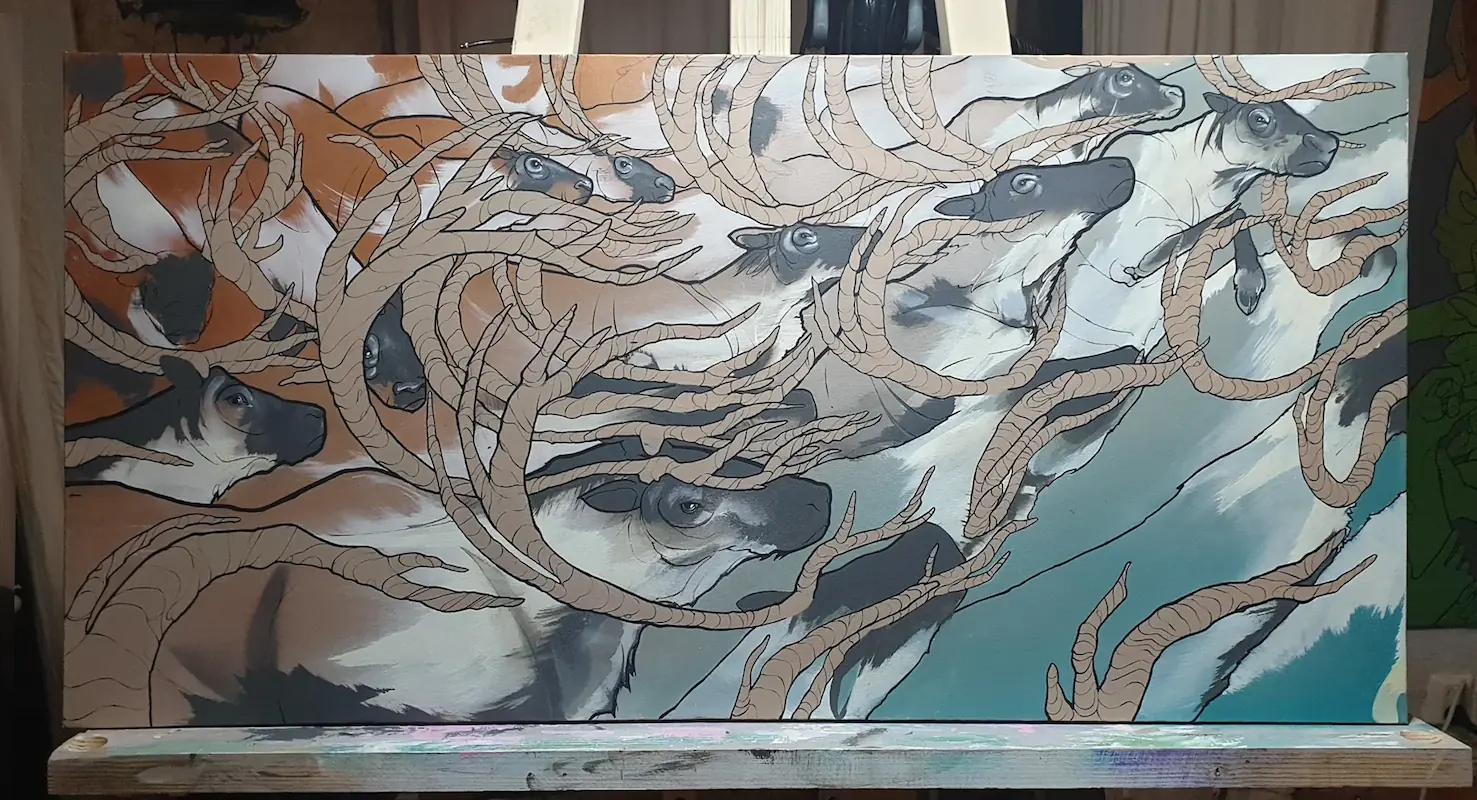
Step eleven: Add outlines and highlights
This is where the magic happens. Add separation between subjects, and sculpt contours with thin lines.
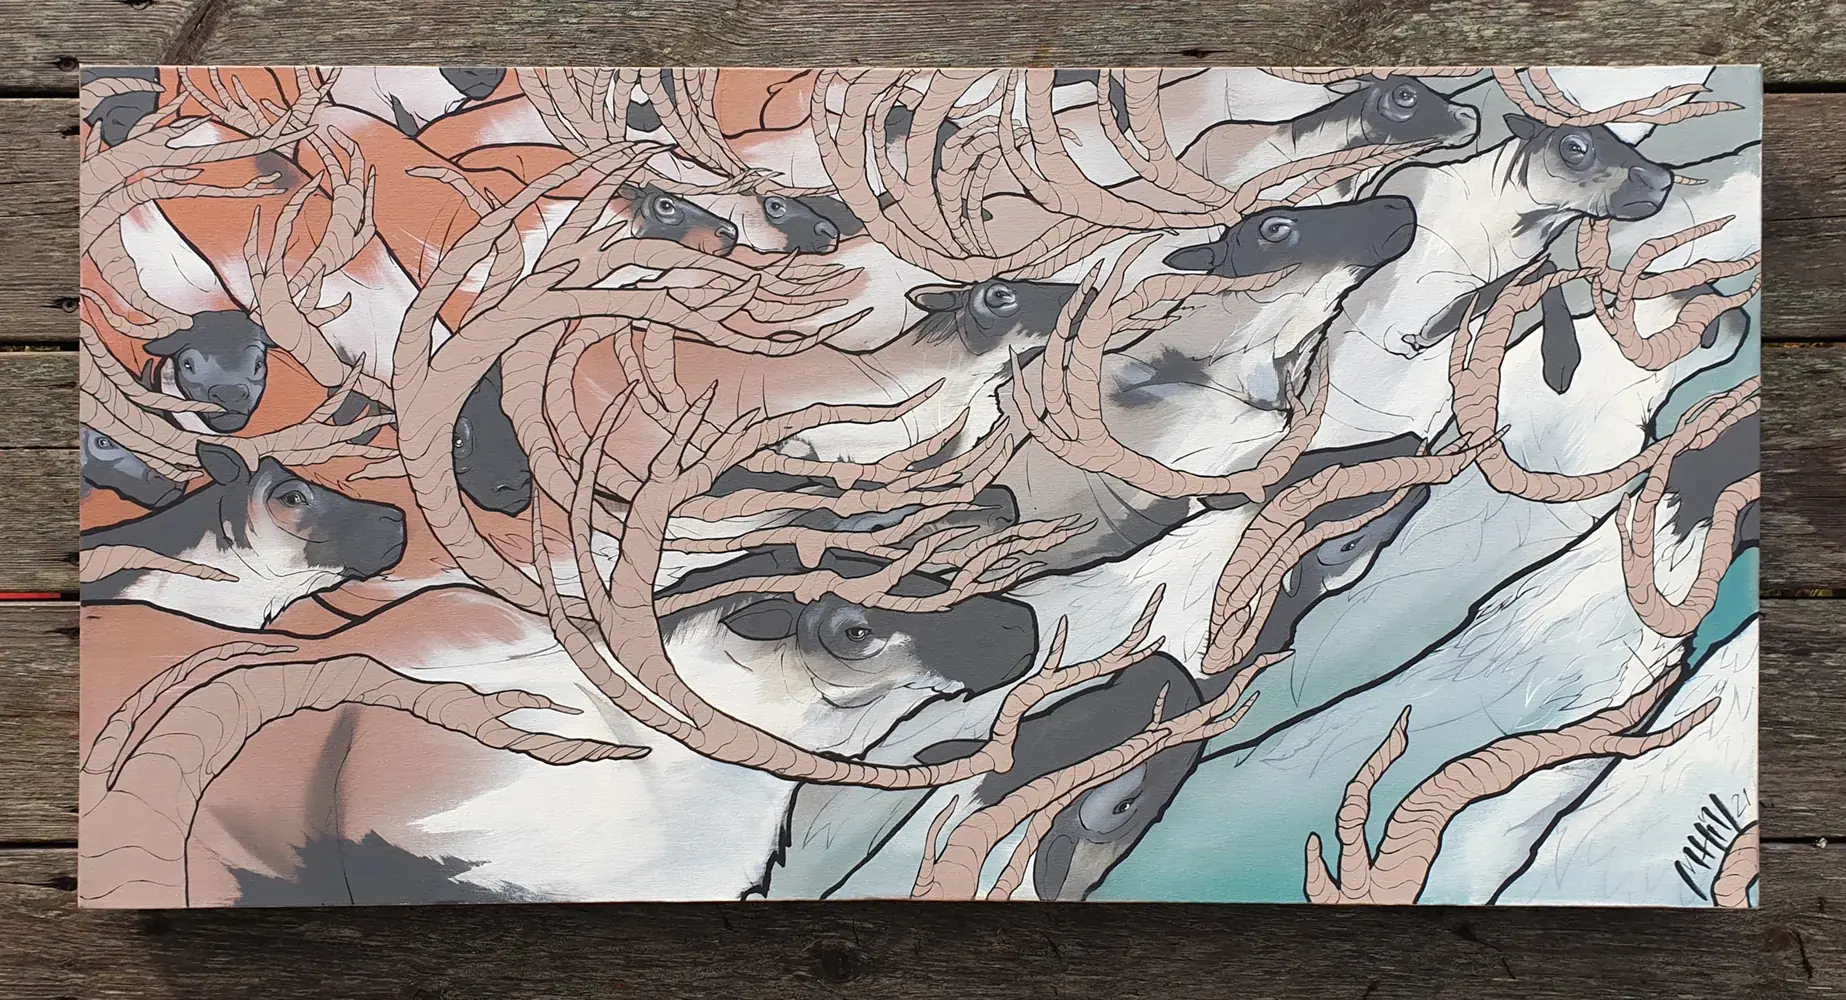
Step twelve: Complete
Hey presto! This is usually the point where I can't stand looking at the painting anymore. Usually takes me about 3 months until I can start to think it looks ok.